“DIY Alien invasion” by Scott Beale is licensed under CC BY-NC-ND 2.0
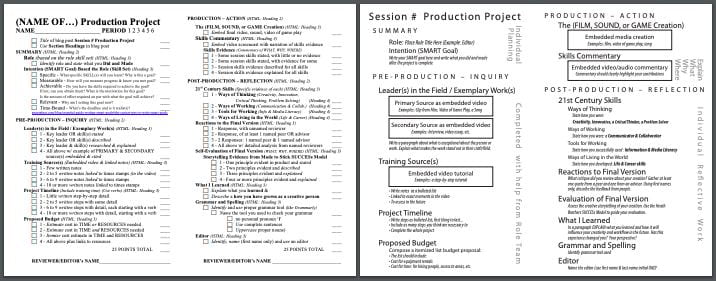
SUMMARY
Role: Producer
Intention (SMART Goal)
To better learn and understand the role of Producer to become better at its clashing role; Director.
PRE-PRODUCTION – INQUIRY
Leader(s) in the Field / Exemplary Work(s)
Jeffrey Hunt is the main programmer at Hoppo Games, his most notable work being Risk Of Rain 2. Jeff was self-taught as a modder, and has made mods for games such as Starcraft and DOOM from the age of 11.
Training Source(s)
Micah
Jacob
General tinkering in Construct
Project Timeline
Create Project and share with team members
Create Player Sprite with basic movement
Create gun
Create bullet
Make player sprite shoot bullets from the gun
Ensure the gun is attached to the player
Ensure the player is bound to layout
Ensure the camera is following the player
Create Enemies
Import Enemies into Construct
Add Pathfinding behavior to Enemies
Code Pathfinding for Enemies
Enable enemies to be damaged by bullets
Enable enemies to die after enough damage has been taken
Enable enemies to attack player
Enable player to die after enough damage has been taken
The player can move freely about the map at all times.
The game restarts when the player dies.
The player can fire bullets.
The bullets damage the enemies.
The enemies die once damaged enough.
The player can be damaged by enemies.
The player dies once damaged enough.
A new enemy spawns once every ten seconds.
POST-PRODUCTION – REFLECTION
21st Century Skills
Ways of Thinking (Creativity, Innovation, Critical Thinking, Problem Solving)
I, with the help of Micah and Jacob, determined that to stop the enemies from spawning on top of each other, that they should spawn every ten seconds rather than every tick.
Ways of Working (Communication & Collaboration)
I consulted Micah each time I tested the project.
Tools for Working (Info & Media Literacy)
As I was developing the game in Construct, I occasionally ran into parts of Construct I was unfamiliar with, and consulted Micah whenever I did.
Ways of Living in the World (Life & Career)
I decided to take on the role of Producer in order to help me become better at its clashing role, Director, which is what I wish to pursue in the real world.
Reactions to the Final Version
In terms of movement, the player is more limited than the enemy.
Self-Evaluation of Final Version
Due to the (mostly) excellent communication between our team, the final version of the project turned out better than I originally expected . My only complaint is that we never began working on a shooting animation due to time constraints.
What I Learned and Problems I Solved
Through the development of our game, I learned how to code more mechanics in Construct than what I previously knew, with a focus on a deeper understanding of pathfinding and basic enemy spawning. I also gained a better understanding of global variables by using a global variable to fix a bug where the game would not restart upon the player dying.
Recently, I found a simple yet amazing to use the Instantiate function that’ll solve problems such as adding to the player’s score when they kill an instantiated enemy. What I needed it for was to untick a boolean whenever a player shoots an enemy.
Here’s how one would go about writing this code:
First, declare the variable:
public GameObject clone;
Ensure the variable is of type GameObject and don’t use an array. The public keyword isn’t required unless you’re going to call this variable in other scripts, for example, if you were using this to add to the player’s score every time they killed an enemy, you’d probably want to use the variable in your score manager script.
Now, you could call Instantiate() when you first declare the variable, although in most cases you’ll want to call Instantiate() in the Update() method, or a function of your own. In either case, you’ll be assigning the variable in one of those methods or functions rather than at the start of the class when you declare the variable. Here’s what I’m talking about:
When I first saw this, I doubted the versatility of this, but since you’re effectively assigning the instantiated clones to this variable, you can do anything with this that you would with a GameObject variable.
You find yourself trapped in a void prison, where only the Milky Way’s worst threats are detained, although you are not without hope; the warden of the prison has created a gauntlet that leads to the light at the end of this seemingly endless tunnel.
Wrongly detained in a void prison, your only hope is The Warden’s Gauntlet, but if you expected an easy escape, the warden detained you in the wrong cell.
Questions
How difficult is the game? If you feel it’s too easy, please explain how it could be more difficult. If you feel it’s unbearably hard, please explain how it could be easier.
When you die in the game, does it feel like you died because you legitimately made a mistake or because of a technical flaw in the game? If you feel like you died because of a technical flaw, please explain.
Peer Feedback
Brev – The game is great with lots of replay value but the first guys go too fast for you to see and you have to have the reflexes of a god to dodge the bosses’ first attack.
5:02 Increment the Y position of our spawn point by 10 so it’s 10 units away from the top door.
5:13 Duplicate the spawn point and ensure the duplicate is 10 units away from the right door.
5:32 Prefab all the rooms and delete them from the scene except for the entry room.
5:45 In the room spawner script, create a public variable of type int for the opening direction.
5:59 If the opening direction variable equals 1, a bottom door must be spawned.
6:05 If the opening direction variable equals 2 a top door must be spawned. If the opening door variable equals 3 a left door must be spawned and if it equals 4 a right door must be spawned.
6:13 In the inspector, type 1 into the opening direction variable for the spawn point 10 units away from the top opening to spawn in a connecting top door.
6:21 For the spawn point to the right, type in 3 for the opening direction value to spawn a connecting left door.
6:28 For the bottom spawn point, type in 2 to spawn a connecting top door.
6:34 Type in 4 for the left spawn point to spawn a connecting right door.
6:58 In the Update function of our room spawner script, check if our opening direction variable is equal to 1. If so we need to spawn a bottom door.
7:02 In an else if clause, check if the opening direction variable is equal to 2. If so we need to spawn a top door.
7:10 Create two more else if clauses checking if the opening direction variable is equal to 3 or if it’s equal to 4. If so we need to spawn a left or right door respectively.
Episode 2
This video leaves off where Episode 1 started. The focus of this episode is making the code to spawn the rooms.
Notes:
0:47 Create an empty game object called Room Templates.
0:52 Create a new script to place on the Room Templates object.
1:01 Open up the script in your scripting editor. Delete the Start and Update functions.
1:12 These 4 arrays are for bottom rooms, top rooms, left rooms, and right rooms.
1:19 Drag and drop the rooms into the corresponding arrays based on their letter names. B for the bottom, T for top, L for left, and R for right. If a room has multiple letters, it goes in multiple arrays.
1:49 Create a “Rooms” tag and ensure it is on the Room Templates object.
2:21 Create a variable referencing the Room Templates game object.
2:34 Set the templates variable equal to the Room Templates script that’s on the game object tagged “Rooms”.
3:07 In the first if statement, instantiate a bottom door from the template’s script.
3:18 Create a private variable of type int called rand.
3:32 Inside the if statement, set rand equal to a random number between 0 and the number of rooms in the array.
3:36 State an index of rand in the array in the first argument for the instantiate function.
3:59 Copy and paste the instantiate function into each else if clause, only changing the bottom rooms to top rooms, left rooms, and right rooms.
4:22 Change the Update function to a Spawn function and Invoke the function in the Start function.
4:42 Type the name of the function as an argument for Invoke. Here, it is typed in between quotation marks, but I’ve learned that Invoke is much more accurate if you call the function like so: Invoke(nameof(Spawn), 0.1f)
5:03 Create a private variable of type bool to determine if a room has been spawned.
5:12 Make an if statement in our spawn function at the top checking if the spawned bool we made equals false.
5:16 Cut the block of code we just made and paste it into the scope of the if statement checking if our spawned bool equals false. If this statement returns true, the code we wrote will be run.
5:26 Set the spawned bool to true as soon as the code runs.
6:08 Create an OnTriggerEnter2D function under the Spawn function. Ensure it has a parameter of type Collider2D and name it other.
6:53 In this function, check if the object “other” has collided with has the tag “SpawnPoint”.
6:53 Double check that the spawn points have spawn point tags Colliders all set to triggers, and Rigidbodies.
Episode 3
In this episode, we will close the remaining openings, define an exit room, and explain how one could expand on this system.
Notes:
1:20 In the last if statement we made, check if “other” has a spawned boolean that equals false and if the current spawn point hasn’t spawned anything.
1:31 If all conditions above are met, spawn walls blocking off all exits.
1:41 In the room templates script, add a public variable of type game object that will store these walls.
1:45 The game object will be a wall the size of a room, guaranteeing the player cannot escape.
1:53 Instiatiate the closed room at the spawn point’s position and no rotation.
1:55 Ensure the spawn points are destroyed AFTER all the code above runs.
1:59 Set spawned to true after the spawn points are destroyed.
6:49 Drag and drop the boss game object to the game object slot in the inspector.
7:10 In the room spawner script, create a public float variable that dictates how long to wait to spawn in a room.
7:15 In the Start function, destroy the game object with this script attached to it after the amount of time dictated by the wait time variable to save memory.
7:41 How one could go about expanding on this system.
8:39 In your scripting editor, remove the two bottom functions.
9:02 Remove the comments on the functions OnStateEnter, OnStateUpdate, and OnStateExit.(Ctrl+Shift+Alt+/ is a nifty hotkey to help you do this automatically)
11:06 Create a variable of type Vector2 for the boss’s target destination equal to a new Vector2 with the player’s position on the X-axis and the boss’s position on the Y.
11:21 Under that line, move the boss to the position of the player using Vector2.MoveTowards using a speed determined by us multiplied with Time.fixedDeltaTime.
2:41 Remove the comments on the OnStateEnter, Update, and Exit functions.
3:10 Create a private variable of type Transform to store the player’s position.
3:14 In the On State Enter function set the Transform variable equal to the transform information on the object tagged “Player”.
3:27 In the On State Update function, make the AI follow the player.
3:36 In the parentheses of MoveTowards() feed in the animator’s position, the player’s position, and a speed value, you’re probably going to want a speed variable for this.
3:49 Multiply all the parameters with Time.deltaTime.
5:31 Create a patrol path and have the AI move along it. A video on the patrolling behavior will be linked here.
5:40 If the player presses space, stop the AI from patrolling.
5:53 In the On State Update function in the chase behavior script, add an if statement checking if the player presses P. If they do press P, make the AI start patrolling.
PLAYING SFX WITH STATE MACHINE BEHAVIORS (TIMELAPSED BONUS)
6:49 In the chase behavior script, add a private variable of type AudioSource.
6:49 In On State Enter set the audio source equal to that on the animator.
“Game Design Industry Night” by vancouverfilmschool is licensed under CC BY 2.0
SUMMARY
My goal is to improve in the area of gameplay coding, but also learn a little bit about art and sound design, the likes of which I haven’t ended up doing myself on any other game design project.
Role: Lead Designer
Intention (SMART Goal)
By June 16th, 2021, I wish to make a fully functional, gameplay-first game that is enjoyable for all gamers as well as further develop my skills in the areas of gameplay coding, art, animation, and sound design.
PRE-PRODUCTION – INQUIRY
Leader(s) in the Field / Exemplary Work(s)
“《戰神》總監Cory Barlog表示單機遊戲不會死 對競爭類遊戲無感” by steamXO is marked with CC PDM 1.0
Cory Barlog is the creative director of the American game design company SIE Santa Monica Studio, best known for his work on the God of War franchise. He also worked on Backyard Wrestling: Don’t Try This At Home and X-Men: Next Dimension as a lead animator. He’s also worked with Crystal Dynamics on 2013’s Tomb Raider as the cinematics director. He stands out to me for writing film-like stories that immerse the player in the world, similar to the works of Christopher Nolan.
“Dark Souls II” by K-putt is licensed under CC BY-NC 2.0
Hidetaka Miyasaki is a Japanese video game director, designer, writer, and company president of FromSoftware. Miyasaki joined the company in 2004 as a game designer for the Armored Core series but later became known for the Souls series, Demon’s Souls, Dark Souls, Bloodborne, and Sekiro: Shadows Die Twice. He stands out to me for telling the story of the Souls franchise through gameplay rather than look but don’t touch cutscenes that spoon-feed the player the story.
“Alan Wake” by K-putt is licensed under CC BY-NC 2.0
Sami Järvi, better known as Sam Lake, is the creative director of Remedy Entertainment and the chief writer of Control, Remedy’s latest game. Lake’s most known and most praised work is on the Max Payne franchise, he has also worked on Alan Wake and Quantum Break as the chief writer. He stands out to me for the astounding world-building in all of his games.
4:11 Mali Matus slows down when the player enters phase 3
4:15 There are no nearby walls to jump on and avoid the untouchable floor. I am working on this as of this writing.
4:20 Mali Matus was supposed to be invulnerable in phase 3, but it didn’t work in this demo.
4:38 I should create a skybox for situations like this
4:51 The walls turn red in phase 3 to warn the player that the floor is unsafe for them
5:40 Upon death, the boss text disappears, and the walls turn black again
5:46 There is also a portal that spawns near the wall closest to Mali Matus.
5:47 The portal currently takes you to the main menu, but I plan to add three more dimensions, all with their own final bosses
Another known bug that wasn’t shown in this video due to the bug somehow not appearing at all in my six-minute-long playthrough of dimension one, is sometimes the dodge will just not work at all. I have no idea whether this is being caused by the Unity editor, something in my code, or if this is a physics-related issue, but I can personally guarantee that I will delay this game as long as needed to fix this issue.
POST-PRODUCTION – REFLECTION
21st Century Skills
Ways of Thinking (Creativity, Innovation, Critical Thinking, Problem Solving)
4:19 Create a private variable of type int to store our waypoint index because hard coding as done above is not a great idea.
4:24 Replace the 0 with the waypoint index variable.
5:01 Check the current distance between the AI and the waypoint their currently traveling towards.
5:13 If the AI has reached the current waypoint they’re traveling to, increment the waypoint index by 1.
5:19 Drag and drop the script onto the character and type in a value for speed.
5:32 The AI moves throughout the path, although a big fat error pops up when the AI is beyond the last waypoint.
5:55 Check if the waypoint index has a value smaller than the number of elements in our “waypoints” array. Subtract the number of elements in the array by one because arrays start at 0 rather than 1.
6:05 If the statement returns true, then keep incrementing the waypoint index by 1.
6:17 If the statement returns false, meaning the AI reached the last waypoint, destroy it in an else clause.
6:43 In the Update function, create a Vector3 for the AI’s direction and give the direction of the current waypoint the AI is going towards minus the AI’s position.
6:51 Under that line, create a float variable for the angle the player is traveling at. Reference the time stamp for the syntax because there is no way I can explain that otherworldly beast of code.
7:08 Now set the AI’s rotation to how many degrees the character should rotate and rotate on the Z-axis.
2:17 Make a public variable of type float for the speed the enemy will rotate at.
2:36 Rotate the enemy on the Z-axis in the update function. (This is a 2D tutorial, but this is the only axis you can rotate a sprite on without flipping them).
2:57 Drag and drop the Enemy script onto the enemy and type in a rotation speed.
ENEMY LINE OF SIGHT (REQUIRED)
3:24 Create a Raycast Hit 2D Variable and set it equal to the Raycast method.
3:43 In the parentheses, give the ray an origin (the enemy’s position), a direction (the enemy’s right), and a max distance (which will be set in the inspector).
4:55 In that if statement, draw a red line in the scene view for debugging purposes.
5:21 In an else clause, check if the ray has not collided with anything, if such is the case, draw a green line at the enemy’s position plus their right multiplied by the ray’s max distance to match the ray’s position.
5:31 Save and close the script. Back in unity set the ray’s max distance in the inspector.
6:09 Add a non-trigger 2D collider to the enemy character.
6:26 In the Start function, make sure the ray doesn’t detect the enemy’s collider.
6:46 Check if the ray has collided with an object with the “Player” tag. Nest this if statement in the if statement checking if the ray has collided with anything.
6:58 Destroy the object the ray collided with. (This part is optional, you’ll usually want to do something else when the player’s spotted, but that’ll do for now)
7:01 Add the player tag to the player. (You most likely already have it on him but now is as good a time as any to check)
MAKING A VISUAL FOR THE ENEMY’S LINE OF SIGHT (OPTIONAL**)
8:11 Create an empty game object and add the line renderer component to it.
2:42 Place it in front of the character and slightly above ground level.
2:46 We will be shooting out an invisible ray from this empty game object. If the ray no longer detects any collisions, the AI will move in the other direction.
4:13 In the parentheses feed in the origin of the ray (ground detection), the direction our ray will travel in (downwards), and the distance of our ray (2f)