2D AI Shooting

Notes:

  • 6:04 Create a private float variable for the time between shots.
  • 6:08 Create a public float variable to start the time between shots.
  • 6:19 Create a public reference to the projectile the AI will shoot.
  • 6:31 In the Start function set the time between shots variable equal to the start time between shots variable.
  • 6:41 In the Update function, check if the time between shots variable is equal to zero.
  • 6:51 Create an else clause that decreases the time between shots by 1 each time the line is executed.
  • 7:21 In the if statement, type in the Instantiate method, and in the parentheses type in our projectile, and the position and rotation we wish to spawn it at. If you want no rotation type in Quaternion. identity for the final argument.
  • 7:44 Under that line set the time between shots variable equal to the start time between shots variable.
  • 8:14 Save and close the script. In the inspector, set start time between shots, it’s 2 seconds in this video but feel free to play around with the value.
  • 8:22  Drag and drop your projectile into the empty projectile slot.
  • 8:41 Prefab the projectile. You need a prefab in the empty slot rather than a game object in the scene.
  • 9:10 Open up a second projectile script to control the projectile.
  • 9:18 Create a public variable of type transform called player.
  • 9:22 Create a Vector2 variable named target.
  • 9:37 Set the player equal to the transform information of a game object with the “Player” tag on it.
  • 9:49 Set the target variable equal to the player’s x and y coordinates.
  • 10:11 In the Update function, move the bullet towards the target.
  • 10:46 Check if the projectile has reached its destination, if it has, destroy it.

Everything from 9:10 can also be used for the player’s weapon, if your game has the player use a weapon, just set the player variable to the object you wish to shoot in the general direction of. And you should rename the variable to whatever you want to shoot, for instance, in Refresh currently, the boss is Voidkeeper 1, so I would name the variable “V1” in that case. The tutorial linked here covers both the prefab method of shooting covered briefly in this tutorial, but also the raycast method of shooting, which could be implemented into the AI being coded in this tutorial.

Simple 2D AI Follow

Notes:

  • 0:42 What you’ll be making (This is why Blackthornprod is one of my favorite game design YouTubers).
  • 1:20 Create EnemyFollow Script and open it in your scripting editor of choice (Visual Studio for most).
  • 1:27Create a public float called speed.
  • 1:42 Create a private variable of type Transform called target.
  • 2:05 Make the target equal to the transform information of a game object tagged player. You can also make the target variable public and drag and drop the player object in the inspector.
  • 2:12  Ensure the player has the “Player” tag on it.
  • 2:24 Next, in the update function, tell the AI to move towards the target. Reference the timestamp for the exact code.
  • 2:47 Recap of what was happening when we wrote the line of code at 2:24.
  • 3:14 Insert a speed value.
  • 3:34 The enemy is going to the player’s exact position and covering them up. This might not be a problem in some 2d games and most likely not in 3d games, although this will be a problem in most 2d games.
  • 3:59 Nest the previous line of code in an if statement and in the if statement, put in the function Vector2.Distance.
  • 4:06 Inside the parentheses, check the distance between the enemy and his target.
  • 4:13 If the distance between the enemy and the player is greater than three, keep moving towards the player.
  • 5:00 Make a variable of type float called stoppingDistance if you want more flexibility over when the enemy stops.
  • 5:02 Replace the 3 value with the stoppingDistance variable.

I should also note this can be done in 3D. Just replace Vector2 with Vector3. Remember Vector 3 takes three arguments rather than two.

This can also be done with the A* Pathfinding Project.

Notes:

  • 1:53 Download the A* Pathfinding Project.
  • 2:03 Unless you have WinRar, 7Zip, or anything like that, extract the contents of the downloaded .zip folder.
  • 2:06 Open the package in Unity.
  • 2:17 Import all the contents into Unity.
  • 2:28 Create an empty object called A* and reset the transform. This will be the central part of our pathfinding system.
  • 2:45 Add the Pathfinder script to the A* object.
  • 2:56 Create a Grid graph.
  • 3:11 Check the 2D box (If you’re working in 2D
  • 3:20 Scale up the graph to cover the entire map.
  • 3:33 Check “Use 2D Physics”
  • 3:36 In this tutorial the collider type is left at “Circle:, and the diameter is increased to 1.3. You should play around with this and see what fits your game best.
  • 3:50 Define a layer for all the objects we don’t want the AI to pass through.
  • 4:31 Generate a Navigation Grid
  • 5:04 Create an empty object and parent the AI sprite to that object.
  • 5:07 Reset the Transform on the AI sprite. It will make your life a lot easier.
  • 5:37 Add the AIPath script to the parent empty.
  • 6:08 Change the orientation on the AIPath script. YAxisForward for 2D games, ZAxisForward for 3D games.
  • 6:13 Adjust the radius of the circle gizmo if you want the AI larger or smaller than the default setting when it moves.
  • 6:18 Adjust the Max Speed.
  • 6:28 Set “Pick next waypoint distance”.
  • 6:47 Disable gravity on the AIPath script. You don’t need to do this depending on your game and where your grid is.
  • 6:55 Add a Destanation Setter script.
  • 6:58 Drag and drop the player into the Transform slot in the inspector.
  • 7:42 Disable Rotation on the AIPath script.
  • 7:55 Add a collider to the AI empty object.
  • 8:34 Add a small script to the AI sprite to flip the sprite in the opposite direction when the target is facing the opposite direction.
  • 8:52 add the Pathfinding namespace to tell Visual Studio we are using A* Pathfinding
  • 9:00  Delete the start function and create a variable of type AIPath and call it aiPath.
  • 9:46 If the AI’s desired velocity based on the current path has them traveling to the right, then flip the AI in that direction.
  • 9:59 Check if the AI is moving to the left in an else-if clause and flip the AI sprite in that direction if such is the case.

Both ways are perfectly viable and produce great results, A* is great for beginners and those who aren’t that confident in their programming skills, and manually coding it, while harder, is much more flexible, for that reason I chose to manually code my AI for my new game and will most likely use that going forward. I just realized the first tutorial about manual coding didn’t cover flipping the sprite, but if I find a way to that, my Refresh GitHub repo will be updated.

Refresh Development Log

November 30th- December 4th

I currently have the player design finished and have had it finished for about two weeks, I just finished Voidkeeper 3 and the Heavy Rifle sketches today, hopefully, I can finish all the sketches or this week at the very least, which would complete the GDD and get it ready to pitch if  I ever get the opportunity and decide to take it, although for now, Refresh is a solo project. MONDAY: Today I have finished everyone, and have decided to completely rewrite The Warden and make him a floating eyeball rather than the cyclops guardian of the void. I have also finished most of the weapon sketches and refined the existing sketches. I currently am right on schedule for a June 2021 release if all goes according to plan, fingers crossed! TUESDAY: Today I have rewritten The Warden and finished designing the weapons for the game. I’ve also removed Pandora’s Expanse in favor of the Chamber of Calamity, to stay more true to my inspirations, Adventure, and Rouge. I have also designed the Chamber of Calamity. WEDNESDAY: Today, I have finished the rough design of The Vacant Cells, thus completing my GDD. I have moved on to my project board and am filling in tasks in the backlog. Since I left off on the task of coding AI before writing in this log, I think I’ll set aside about thirty minutes to an hour playing Void Bastards to see just what the A* Pathfinding Plug-In can do for AI THURSDAY: Today I have moved on to my project board and started adding tasks ranging from production all the way to the end of post-production in hopefully early summer so that I can publish mid to late summer 2021. Yesterday, I said that I would play Void Bastards for about half-an-hour to get a feel for the A* Pathfinding Project. It seems like a great,  simple, AI package for Unity, but with a heavy emphasis on simplicity. The AI just felt like basic stealth AI, which gets the job done for a game like Void Bastards, although for Refresh, I’m thinking I’ll use Refresh to supplement coding AI from scratch rather than using A* alone. I’ve actually used A* myself on my recently canceled project, A Safe Place, and I was able to get basic AI that would move toward the player and attack them when their attack trigger collided within two clicks and about four lines of code, but I plan for the AI in Refresh to be slightly more fleshed out than that. FRIDAY: On Friday, I prioritized tasks with the Fibonacci sequence, opened Sprint 1, and inserted tasks into sprint 1.

December 7th- December 11th

MONDAY: Today I began working towards the MVP, which I hope is finished by the 18th. I added the player sprite, a movement script, a health script, as well as a death function. I also created a game over screen with a restart button and a button to take the player back to the main menu. I have the due date for sprint 1 set for Friday, meaning the end product won’t be pretty, but if another sprint is necessary, I have one more week until winter break. I have also tied the player dying to a loss, I have also made an AI that tracks the target, has a limited amount of health, and dies. I have also figured out how to detect multiple game objects with a single collision parameter. I completed all my planned sprint 1 tasks today, so I don’t know how much I’ll be doing tomorrow. TUESDAY: Like I said, I didn’t do nearly as much as yesterday, but I’ve still done plenty. Today I created the main and coded the main menu, created the options menu, as well as a minimalist heads-up display, although I’m still in the MVP phase, I believe this HUD looks somewhat like what will be in the final product. I have also made the player’s bullets deal damage to the enemy. At the rate I’m working at, I expect MVP will be finished later today or Wednesday, and that we might be able to expect the final product as early as mid-May, although I would still expect a mid-June release in case anything comes up. I’ve decided I don’t need this boss to shoot a projectile, the AI’s attack is a charge that does 50% of the player’s health, which the player can narrowly dodge, and get off one-fifth of their health with a bullet every time they do. Other than implementing that, I also added a health bar for the boss (it just displays the number, but possibly a bar in the future), and a pause menu has been added. Now I can say MVP is 100% complete, which is where I wanted to be for winter break, which is coming up in about a week now. Thus the rest of this week, as well as next week, will be note-taking days, meaning you won’t see anything in the devlog, because other than commenting on code to prepare me for the two-week holiday break, I won’t be working in Unity for that time. There will be a lot of blog posts though, on game theory and the concepts in game development I should keep fresh in my mind at all times. Happy holidays! WEDNESDAY: Like I said, I didn’t make any changes to the game after Tuesday. On Wednesday I took notes on two methods of making a simple 2D AI that follows a given target, this also works in 3D and is the backbone for enemies in single-player games, regardless of the genre. I also found time to take notes on 2D AI Shooting, which is a bit more genre-specific, and thus tutorials are a bit harder to find on the subject, so I did spend a bit more time on this because of that.  I have decided that at least most of what I will be doing tomorrow for this project is playing other single-player games and studying how they are replayable past the main campaign. Refresh, the game I am currently developing, will be very short, 5-10 hours for the hardcore to the semi-hardcore audience and maybe 15 hours for the casual player. Thus, to prevent people from just buying, playing through the game once, and returning the game, I should have some kind of replayability present. THURSDAY: I lied, I am updating this log still, although I have paused development on Refresh until after winter break because Refresh reached the state I wanted it to be in on December 18th, the day before winter break, on December 8th, the second day of the prior week. And thus, yesterday and today have been note-taking days, Refresh is an ambitious project, maybe not as ambitious as most games but pretty ambitious for a solo developer. Because of that, I am taking this extended week to take notes on concepts I’ll need to properly grasp come the new year as well as for future projects. Now progress on my notes, I have currently just finished taking notes on a 2D Patrol AI, useful for 2D platformers and simple stealth games. As the day progresses, I wish to take notes on AI programming in C#. And once I’m done with that, I’ll play a couple different games and take notes on what makes them replayable to get ideas of what the replayability factor should look like in Refresh. FRIDAY: On Friday, I took notes on stealth AI, more specifically, a line of sight via a ray. It doesn’t have much (or anything) to do with my current project, although I’ll most likely need it in the future for other games I create.

December 14th- December 18th

MONDAY: Today, I finished taking notes on tower defense AI and have started to take notes on making more advanced AI with state machine behaviors. TUESDAY: Today, I finished taking notes on state machines in Unity and I also started and finished taking notes on making a boss with the state machine now that I know how it works. That finishes up the AI portion of my note-taking, from here, I’ll mostly keep working on the GDD for Refresh and then starting to take notes on level design for different styles of games, but given I only have three days I’ll probably keep everything related to Refresh. WEDNESDAY: Today, I watched some videos on random dungeon generation to see what videos I could best take notes on. I settled on a 3 part miniseries by Blackthornprod and began to take notes. THURSDAY: Most of my note-taking on the three videos took place today where I ended up finishing all three. Since I can’t do as much work on Tuesdays and Fridays compared to Mondays and Thursdays due to schoolwork, I’ll finish up this week with what’ll most likely be 30 minutes to one hour of SoloLearn because I need to 1) Brush up on C# and 2) Get certified in C# because if I wish to turn this into a career a C# certificate would look really nice on my resume. Happy holidays! FRIDAY: Today, I did an hour of SoloLearn, I got to the Classes lesson. I have been learning a few things I haven’t learned from Unity, but overall the C# course is a lot of review for me, but it’s all stuff I want to keep in my mind and I would like that certificate for my resume. I also came up with ideas for three side bosses:

Happy holidays!

January 4th- January 8th

Happy New Year!

MONDAY: Today, I finished an aiming system, the player can aim their weapon along the Z-axis. Now, this is a 2D game which although doesn’t use the Z for movement, does use it for rotation, despite common thinking. I used this method because since it rotates all around the player, they can be very creative with how they approach fights as well as movement. This system took me the better half of the day, leaving me room to work on two mechanics as well as make tweaks to Voidkeeper 1 to make the fight a test of reflexes and reaction time rather than perform the eleven tasks I was able to do on December 7th. Currently, the fight with Voidkeeper 1 seems fairly challenging to me, almost too much so, but my hope is to get my friends to play the game in its current state to get a clear sense of whether the game is actually challenging, impossible, or not that challenging and I’m just bad at video games, even the ones I make from scratch. TUESDAY: Today, I didn’t make as big of a mark as I did yesterday, the big thing about today is that I added walls that kill anyone on contact. I also made more tweaks to the boss and looked at what an entry room, where you could access all the levels, would look like, and I think I’ll go that direction. I’ve still been thinking about what I want to do for the levels whether they should be randomly generated or hand-built as I’m approaching the point where I’ll begin adding levels into my game very quickly. I also got my brother to playtest the game and tell me if the game is a proper challenge thus far, shortly, I hope to get more people to playtest, but we all only have so much time in the day. WEDNESDAY: Today, I started the room where the player will fight the tutorial boss to initially grasp the mechanics. I also started on an evasion mechanic, it’s essentially an extra jump after you’ve already jumped twice to help with the small amount of parkour in Refresh, I didn’t want to make it too complex because 1) Programming something super complex would take me well beyond June 16t, thus I would have to delay the game for weeks or even months. 2) My target audience doesn’t want a complex mechanic, so a simplified evasion mechanic will do just fine. THURSDAY: Today, I started on a new mechanic; the player can now press E after they have jumped twice for an upward burst of speed to assist them with the slight parkour mechanics. I also have worked more on the second boss enemy, which is in an almost finished state now by next week, they should be ready to prefab so I can move on to the third boss, begin work on the three trial areas where the player will fight these bosses, as well as the Chamber Of Calamity, where the player will end the game by fighting the warden of The Void Prison. FRIDAY: Today, I finished Voidkeeper 2, which took some time to get right, mostly due to me being unable to keep him in the air once he was flying, so halfway through the development of Voidkeeper 2 I decided that V2 will act like a predator missile instead, it’ll help the player master the dash mechanic. Speaking of, I finally got that mechanic up and running. I could very well keep it as is, and might if things start going horribly wrong, although I wish to add a cooldown to make the dash more of the last resort if players get themselves in a sticky situation, otherwise, I’d ship the mechanic in this state. I also got to work on Voidkeeper 3 today, because I’m using a universal health script for the enemies I didn’t need to code his health, it’s been plug and play since I finished Voidkeeper 1. He also his player tracking and movement now because, after Voidkeeper 1, I’ve been able to copy and paste the code to get it working to save time. I think I’ll work on making the AI more advanced on the backend once I’m done with Voidkeeper 3, I also would like to add a range limit to the player’s bullets so that they won’t go into the abyss when you miss your shots.

January 11th- January 15th

MONDAY: Today, I created three levels, and a script for transitioning between them, as well as a trigger the player, must collide with to transition to a given level. TUESDAY: Today, I added the three boss enemies to these levels and tested out the transitioning. Transitioning between levels was a bit weird I found out, but that was due to me using Cinemachine, which is a package built-in to Unity that lets you create virtual cameras. This is pretty great for having a camera that follows the player without having to write a whole bunch of code, but even better for multiple scenes, because the virtual camera can be following the player, and every Main Camera has a Cinemachine Brain, which makes it so the virtual camera will become the main camera once the player enters that scene. Once I figured that out I got started on Voidkeeper 1’s trial, I decided to keep Voidkeeper 1 a fast AI, but not have a lot of health, and he can only move on the X-axis, and thus only track your X-axis movement, thus promoting the vertical abilities where the game shines in my opinion. I also would like the player to fight five clones of Voidkeeper 1. The script to spawn him in a spawner was the easy part, but getting him to spawn five times, and only spawn one, and then another, once the one on-screen dies until five have been spawned, was probably one of the hardest mechanics in this game to code. But by about 5:00 PM, which is when I usually stop working, it worked exactly as planned. I then tested and realized it was just as hard on the player as the development was on me, and I don’t know if I want to fix that or embrace it. WEDNESDAY: Today, I thus far haven’t been able to get anything done due to a power outage. I am still awaiting a playtester or two to help me decide if I should change the fight’s difficulty. The good news is that I get my brother today, he loves this game and is within the target age range for this game, 9-14 years old. Although I think I’ll send a restricted build to a few friends. At about 5 tonight I’ll update this blog with the details of what I manage to get done today. As predicted, I didn’t do as much as I’d like to today. I made a victory screen for each trial, coded it into the Game Controller, added the UI to each trial and that’s about it as far as work is concerned. I also had my brother playtest Voidkeeeper 2 and 3 because I’ve had those test builds sitting there forever. He also playtested the game in its current state, saying that it was hard to grasp because I’d made so my changes between the test builds that he played and the game now, which says to me I should’ve given him a third build to play to get acquainted with these changes that are more reminiscent of how the game will be shipped. THURSDAY: Today, I got the first trial done and began work on the second trial. I would’ve done more on those but there were so many UI-related bugs that popped up out of seemingly nowhere that I had to fix and fixing all of them costed me about an hour, which wouldn’t be too bad if they hadn’t popped up around 3:00 PM, leaving me one hour to develop before I wrote how today went in this devlog and call it a day. Despite not having a lot of time, I still was able to get the UI to become modular for a multi-scene game.

January 18th- January 22nd

Monday was a holiday, and thus a day off, and Tuesday I ran out of time due to homework. WEDNESDAY: Today, I mostly just threw around ideas, the three trials were already done, but I didn’t know where the game was going. Then my baby brother, who’s playtested this game as he is in my target age range, gave me an idea, dimensions, which would work quite a bit like Dead Cells’ boss cells. In lamen’s terms, after the final boss of the first dimension, you would play all those levels once again with a few gameplay tweaks to make things more difficult; more enemies, faster move speed, smarter AI, ext. Although I’m not going to implement it exactly like Dead Cells because I’d rather not be forced to permanently halt development due to being sued for copyright infringement. Because I’m already leaving a few things out from the Dead Cells version, I think I’m in the clear, but, to make sure, and to make the game more fun, I’ll add a different end boss to each dimension, the fourth and most difficult hosting the final boss, the warden of the void prison. And to make Refresh more like what I first intended, which was a rouge-lite, I’ll add perma-death as a feature, meaning getting to the end of the fourth dimension will be much easier said than done. Besides this brainstorm, I also tweaked trial 1 slightly, or tried to, I tweaked it back after and got started on the final boss for dimension 1. THURSDAY: Today, I got to work on something I’ve been trying to figure out for a while, how to make trials 2 and 3 longer, while I still don’t have 3 completely figured out, I got to work on making trial two longer with more enemies for the player to fight, as well as a boss I plan to work on tomorrow. The enemy variety isn’t huge, but this isn’t meant to be any big game, just something to put on my portfolio that I went from start to finish designing it. I also plan to distribute as a game best suited for an ages 9-14 audience.

January 25th – January 29th

Monday, nothing productive was done because I was studying for my PSAT, Tuesday was the day of my PSAT, so logging into Unity was impossible. WEDNESDAY: Today, I solved my raycast issue with the help of the Unity Forums. Turns out all I needed to do for the object was to stop it from detecting its own collider, I found this solution by creating a test scene and creating an empty game object and attaching the script to that object. The draw line function worked. I then added a collider to test if the ray was detecting those, and it did. With the ray fully functional I brought the object in question into the test scene and turned the collider off, the raycast worked. I then went back to trial 2 and stopped the raycast from detecting its own collider. Then, it worked as I wanted it to. I also worked on a camera offset the last few minutes I worked and found -0.6 was good for Refresh.

Thursday and Friday were just me working on getting the raycast in the proper angle to spot the player, on Friday, I finally got it working.

Febuary 1st – Febuary 5th

MONDAY: Today, I made the far wall cave in on trial 2 when the player begins the boss fight. I also worked on getting the correct angle for the raycast some more and found it quickly. Although the bulk of my day development-wise was making the walls cave in on trial 2 when the boss fight starts, as well as creating a short tutorial that is ultimately a run-down of the basic mechanics because I had quite a few assignments to do for finals.  TUESDAY: Today, While wrapping up the third trial, I mostly focused on responding to the feedback I recently received. they enjoyed the game, but they said the clones on trial 1 were too fast, and the boss didn’t give the player enough time to react, so those were my focus for the day. It only took me about an hour to find the perfect numbers, although it was late when I read this feedback, all day I was working on a finals assignment. So when I was done responding to the feedback, I created the shield generators for trial 3 that make Voidkeeper 3 invulnerable. WEDNESDAY: Today was quite a productive day, I worked on and finished the shield generator ads, there’s only one at the moment because of the amount of trial and error, adding more is also going to be one of the ways I increase difficulty. Later in the day, I also got the final boss of the first dimension up and running, with his first phase up and running. Since I’m using a universal follow script, I decided to refine the follow a little, as before they’d get stuck on a wall, now they crash into a wall, which would make a damage timer to prevent camping the bosses until they die a nice addition to the game. Because of the immense trial and error of both tasks, that’s all I got done. Tomorrow I plan to add a health bar so that the boss text can fit the names of the final bosses because right now I have to do a bit of scaling to fit the name, which I’d rather not be the case. Health bars are also standard in all games in one form or another. THURSDAY: Today was quite the day, I tried to delete a sprite of a character who was cut from the game but ended up deleting my entire sprites folder, although, after about ten minutes, I recovered everything. Then, after I finished and implemented the health bar, the hit registration on the trial 1 and trial 2 ads, as well as the trial 3 bosses all stopped working.  I looked for a solution to this problem for hours, and then after I reboot my computer for the second time, the bug fixed itself, the same thing popped up in my last project, A Safe Place. Once that bug fixed itself, then the die function wouldn’t work on the enemies, although it worked just fine on the player. I tried taking the function out of the take damage function, and I tried adding a maximum health integer because I was thinking the health bar was to blame.  After several reboots of Unity, and several reboots of my computer, and several hours of internal screaming, I was about ready to cancel The Warden’s Gauntlet and move on with my life. But then, as a last-ditch effort, I went back to yesterday’s last revision, and everything was back to normal, the hit registration was working, health was going down, the enemies died when they were supposed to, and then 5:00 PM hit. So by and large, the development of my game didn’t progress at all today, so if this continues, expect this game to be delayed by a couple days to a week. Although I plan to work into about an hour or two of crunch time tomorrow, so if I’m productive during the day as well, which that’s usually a yes, I might have to retract my previous statement. FRIDAY: Today was quite a productive day. I mostly just got some work done on improving the AI, which I still need to work on, as well as tweaking little things that will make the game a more enjoyable experience for the player.


February 8th – 12th

MONDAY: Today I worked on a dodge mechanic (which is really just a forward dash) to help the player outmaneuver the AI. It took me quite a while to particularly get the player to pass through the enemy colliders so they can come out of the dodge on the other side of them, but I eventually found out setting all the colliders to discrete would help, because discrete colliders can’t detect other colliders moving at remarkable speeds, so pushing the player about -2050 units on the x-axis with the rigidbody did the trick. Although when I tested it, the UI could catch up fast enough after the dodge that the player couldn’t react.

TUESDAY: Today, I wasn’t able to do anything, although I don’t think crunch will be needed, because plenty has gotten done in the past couple of days and there isn’t too much left to do until post-production. Instead, I worked on my math quiz and history test. WEDNESDAY: Today, not a lot got done, but the quality of what got done is what matters here. This morning, I fixed the AI for Voidkeeper 1 specifically, as the standard follow AI is perfectly acceptable for Voidkeeper 2 and 3, as well as the ads on trials 1 and 2. What I did to the AI was made it track the player’s position on the previous frame, this way there is some time between the player avoiding the enemy and the enemy reaching and killing the player. There are probably better ways to program AI for the style of game Refresh is, but I found this to work quite alright with all other mechanics in play. Speaking of other mechanics, I also worked a bit on the dodge mechanic. I gave it a cooldown so the player can’t spam, although, at the current value of half a second, it shouldn’t be too noticeable. I also attempted to add multiple directions to the dodge, although because of the limited camera angles I have to work with these are just forward and backward (don’t ask me why you’d need a backward dodge). There were also a few bugs I needed to fix in the dodge, and I yet to know if I got to all of them, but if I didn’t, I always have tomorrow. THURSDAY: Today I got a dodge mechanic up and running, which is really just a forward dash since I’m working in 2D space rather than 3D. There are quite a few ways I could’ve gone about it, but what I decided on was added a force to the rigidbody that was insanely fast. FRIDAY: Today, I worked on improving the dodge mechanic, specifically, making the player pass through colliders while it’s active, after spending all day on the Unity Forums, I found that because the dodge was so quick if I set all collision detections, including that of the player, to discrete, the player would pass through the enemy colliders due to the speed of the force that’s pushing the rigidbody.

February 15th-19th

Monday and Tuesday were President’s Day and Mid-Winter break, thus nothing was done. WEDNESDAY: Today, while I was able to at least set up a script to manage the boss phases, my whole day ended up being dedicated to an immortality bug. Only about an hour or two after I discovered the bug, I found out how I went about spawning the boss object was what was causing the problem, so from there I knew the solution was related to that. Although the solution took me an embarrassingly long time to figure out, simply disable the sprite renderer and AI scripts before runtime, so the play can’t see the boss and the boss doesn’t move towards the player, and then enable them when the spawn boss boolean equals true.

February 26nd- 26th

MONDAY: Today, I worked on and almost finished the coroutine for phase 3 this morning as well as the script making the floor kill the player on collision, but the rest of the day, my assignments got all my time. TUESDAY: Today, I finished the coroutine, as well as spawning the generators one by one for an infinite period of time, destroying it if it touches the ground or the boss, and getting its health to go down and go inactive when the player shoots it, it also stops the generators from spawning. All I need to do to complete the programming of the generators is to make the boss vulnerable to damage when the player shoots one, which should be quite simple. WEDNESDAY: Today, I got to work on the final part of the generators; the player being able to shoot them and make the boss able to take damage. I previously thought after spawning the generators, it would be pretty simple, but then instantiate crashed Unity, and then I found it wasn’t as easy as I thought. Although to fix the crash, I had to ensure they only spawned one by one by using a boolean. Although I was searching all day after that for a way to only have the boss be vulnerable in phase 3 when a generator is shot. I tried all kinds of things, like disabling the is invulnerable boolean from the shield generator’s health script to check if the prefab was active in the hierarchy. It wasn’t until about four-ish that I found out how to store instantiated clones in a variable, but then I did, and it was awesome. It worked exactly as I wanted it to, disabling the boss’ invulnerable boolean and letting him take damage when one of the generators is shot. THURSDAY: Today, I made a portal spawn near the boss’ body when the boss dies. Other than that, I just commented on all my code.

FRIDAY: Today I commented on the rest of my code and made every variable that was public for the sake of added field control private serialized variable. Although with the number of scripts I had, it was a bit difficult to find what variables were being assigned where, although after about an hour of warnings and compiler errors being thrown in my face, I found what needed and what didn’t need to be public. After that, I found that instantiating the generators wasn’t working the way I wanted it to, but that was due to a simple mistake I made when typing a line of code in the script that makes the floor unsafe for the player. I then built out the game and played the standalone only to discover some changes that needed to be made. I made those changes and then built that version out. That was the version I uploaded to itch.io and recorded the gameplay demo with. Although even with that build, I see some small changes that could be made, but not even the size of the small quality-of-life improvements I made before uploading to itch.io.

March 1st-5th

MONDAY: Today I didn’t do that much with my game because I had quite a bit of schoolwork to do. Although I finished the first gameplay demo and uploaded it to itch.io. TUESDAY: Today, I got quite a bit achieved. I resized the map for the final boss so that the player could find a wall by phase 3, made Voidkeeper 1 a little more difficult by increasing his speed, decreased the speed of Mali Matus, as well as decreasing Mali’s health to 1000 instead of 12000, and I made a separate AI script for the guard on trial 2. WEDNESDAY: Today, I have come to the consensus that I will pause the development of Refresh for the time being to figure out what I should do for post-production. THURSDAY: I have some news before I say what I’ve done today, the development hold has ended, I know surprising, I’m being indecisive, again. So with that out of the way, I created the art for the levels today, which was the one thing in pre-production where I knew exactly what I wanted, surprising, I know. All the level art I was able to get done fairly quickly as I decided on having only one or two colors in each background to help with paying tribute to the legendary Atari game Adventure, plus my art skills are essentially non-existent. Although next up on the list is defining the mood of the game to help in developing the soundtrack, that might’ve helped in the trial backgrounds as well now that I think about it but that’s something for another time. Tomorrow most likely.

Game Design- Week 13- Project Update

A rough sketch of the HUD for Refresh. Made with GIMP.

Refresh

Refresh is a third-person shooter with movement reminiscent of arena shooters such as Quake 3 and rogue-like elements, meaning perma-death and randomly generated levels. The player assumes the role of an unknown person in the form of a parallelogram trapped in the void with a simple goal: escape. In their way stands four deadly boss enemies, Voidkeepers 1, 2, and 3, as well as the Warden, who can only be fought once all three Voidkeepers are defeated. Although on each death, the void is refreshed, resetting the player’s progress toward their goal, as well as regenerating the world.

My intention with Refresh is to improve as a gameplay programmer especially but to also improve as an artist and a sound designer, I don’t think I’ll worry too much about animation for the time being, although this project is still in pre-production so that is subject to change. For now, Refresh will have minimalistic graphics because nobody really knows how the inside of the void would look. At least for now, the characters will also be more minimalistic drawings, with the player being a parallelogram and the Voidkeepers also taking the form of shapes, although if I do change my mind on the sprites being minimalistic, I am more than open to challenge myself.

There will also be a vague narrative and a timer to track player completion time of the trial to encourage replayability. The enemies will also have very narrow damage windows, very high kill potential weapons, and high health pools, making all four extremely difficult to fight. Although there will be no power-ups or anything to aid less skilled players as part of the game is the player learning from their mistakes and overcoming the boss on their own, even if it takes a million tries. That is why I have decided to have only four combatants for the player to fight, rather than rooms full of enemies, to put it simply, I’ve decided to make more of a Souls-like challenge with weapons.

Sketches

I only have a few designs done, and keep in mind these will most likely be changed going into production, but here’s some concept art.

Player character

Voidkeeper 3 with his shield covering his body

Heavy Rifle wielded by Voidkeeper 3 (and able to be picked up by the player?)\

Timeline:

Week 1:

GDD made the game introduction and rules of play sections were filled in, as well as the maps and enemies being started. Normal Enemies were also being written at this time. Voidkeeper 1 was finished at the end of the week and I was starting on Voidkeeper 2. I had also started on describing the key features of Refresh and worked on the flowcharts.

Week 2:

Maps are more detailed, The maps are The Cells Of Empty and Pandora’s Expanse. The concept of normal enemies is taken out of the game in favor of the four boss enemies. A short narrative and description of the difficulty was also written at this time. 4 rough sketches were also made for the player, the fourth ended up being inserted into the document. I also created the HUD which was fairly easy, I’d already had the desired font from another project, and just had to use rectangles from there.

Week 3:

This week I was focused on designs, although I’m not that good of an artist, so the designs are very minimalistic, I’m talking shapes here, but maybe that’ll do for the void, maybe not, this week I got three more player designs done, the seventh ended up being final, I didn’t have time to work on much else because of schoolwork. Although I did get a description of a “TRIAL OVER” screen.

Week 4:

I just came back from a Thanksgiving break, so this could technically be week five although I’d like to get pre-production over with before I’m just starting production in January. So far this week, I’ve still been working on designs, all that’s complete thus far is the Voidkeeper 3 and Heavy Rifle design. I think I’ll start a devlog on my blog starting from this week to track my progress in developing Refresh.

Release Date:

I honestly have no idea when I’ll be able to publish given I’m still in pre-production, but I’m shooting for summer 2021.

Game Design – Week 11 – Updating Workflow – Mind Like Water


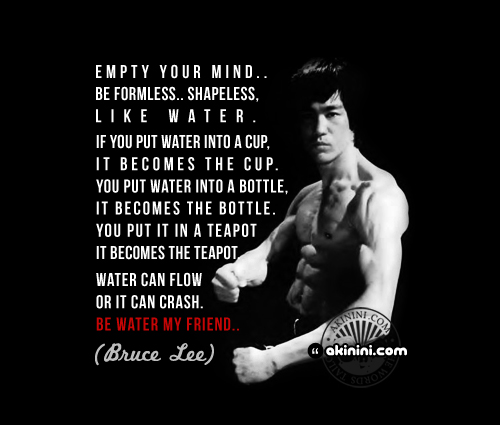
“‘Be shapeless and formless.. like water’ (Bruce Lee)” by Akinini.com is licensed under CC BY-NC-ND 2.0

“Have a mind like water.”

― David Allen,  GTD

SUMMARY

I got hands-on experience with Construct 3 and found how good of a beginner-friendly engine it was. I also learned about the daily D.O.S.E of happiness humans need, I knew about the basics of those chemicals but I’ve never really learned about them until this week.

PRACTICE ROOM (TUTORIALS)

Unity – C#

I left off on Passing Arguments. Being an advanced student, I’m aware it’s no longer a requirement for me to take C# in SoloLearn, but we all need refreshers. And I need a certificate in C#.

CLASSROOM (THEORY & ANALYSIS)

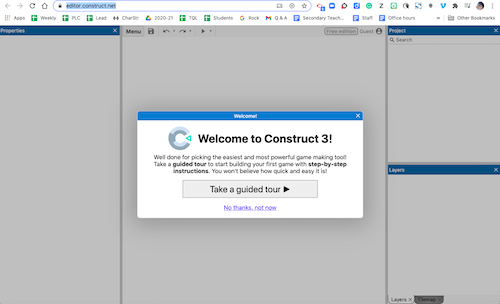
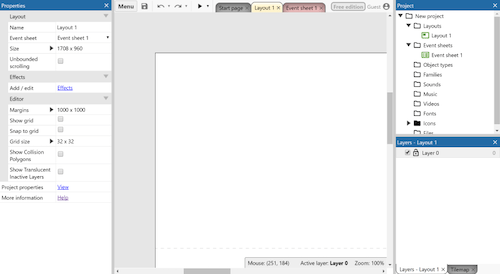
Screenshot from Construct.net

Construct 3 seems to simplify every aspect of game design with the engine’s block-based approach, although, you can still create scripts in Javascript. I think Construct 3 would be a great place to start for beginning students, although not an engine to stick with due to Construct being rather limited in areas where Unity is not.

LAB (THEORY PRACTICED)

Screenshot from editor.construct.net

OUTSIDE (PRODUCTIVITY & THE BRAIN)

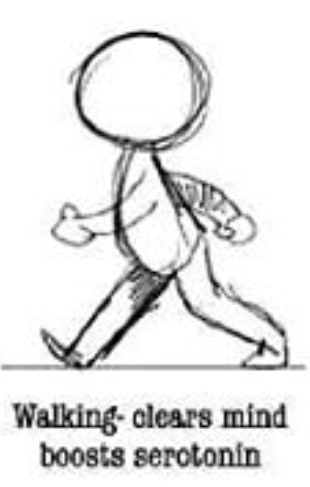
Image from bananatreelog.com

  • Every day, I start by putting tasks in my GTD system, I then work on my game a bit during my 1st-period check-in. Whenever I’m on my computer, designing something or in between classes, if I have the time to, I put on my headphones and listen to music. Every day, I try to take a walk or exercise on my grandpa’s exercise bike depending on the weather. And finally, every day I eat a vitality bar made of a base of dark chocolate, dates, and peanuts.

STUDIO (CREATIVITY)

Screenshot from Construct Beginner’s Guide

I liked how I could get simple tasks like moving done in half the time in Construct than coding in Unity but many things that I’ve grown accustomed to like timed object spawning were not available to me in Construct 3. I still think this would be a great start for your first year in the class, but move up to Unity ASAP due to the sheer amount of limitations in Construct 3.

CONTROL ROOM (PRODUCTION)

WHAT I LEARNED and PROBLEMS I SOLVED

I learned about what the 4 happiness brain chemicals do, I always had ideas as to what their functions were but could never quite pinpoint them. I also learned about a block-based solution for those starting out in the game design industry, being block-based removes some functionality from Construct, although you can add most of those details via JavaScript. I still think the best engines out there are Unity, Unreal, CryEngine, and the homemade engines from AAA companies, especially Rockstar’s RAGE engine.

In Construct, I was trying to figure out how to change the background to another image and thought I could with “Get Image from URL”. I couldn’t, the solution I tried to this was to download the image, add it as a sprite that also covers the entire layout, set the opacity to 0. Then I made two events, one for M being pressed and one for N, in both those, I changed the opacity of the normal map and Norse map accordingly.

WEEKLY ACTIVITY EVALUATION

Game Design- Week 10- GTD- Getting Things Done Part 2

Image from BiggerPlate.com

Teens are overwhelmed, partly because they don’t yet have the skills to manage the unprecedented amount of stuff that enters their brains each day.  – from LifeHacker.com

“Your mind is for having ideas, not holding them.”

“You can do anything, but not everything.”

― David Allen, (GTD) Getting Things Done for Teens: Take Control of Your Life in a Distracting World

SUMMARY

This week I learned about a productivity system called GTD or Getting Things Done. I’ve also implemented GTD into my existing trusted systems to great success, somehow, it’s made me a better manager of my time than I used to be, and I’ve always been a pretty good manager of my time.

PRACTICE ROOM (TUTORIALS)

Unity – C#

I left off at the lesson on the break and continue statements. Throughout my years at Capital, I’ve wrapped my head around some of C# by using it in Unity, but I’ve never gotten around to getting certified. I’ve learned some more about C# along the way as well, so certification isn’t my only reason today.

CLASSROOM (THEORY & ANALYSIS)

Screenshot from Animated Book Summary And Review at YouTube

I learned about GTD. GTD, a great system for keeping track of information and completing day-to-day tasks. GTD is based upon the concept that our brain is for creating ideas, not holding them. With this in mind, I have created to Trello boards that both use GTD. I think I may have used GTD in some other fashion beforehand, but it helps to stay more organized, even for someone like me who tends not to miss deadlines.  On the subject of not missing deadlines, I’ve actually gotten pretty close this year, which means my current form of GTD was failing which meant that making a new system was par for the course.

LAB (THEORY PRACTICED)

GTD-based Trusted System

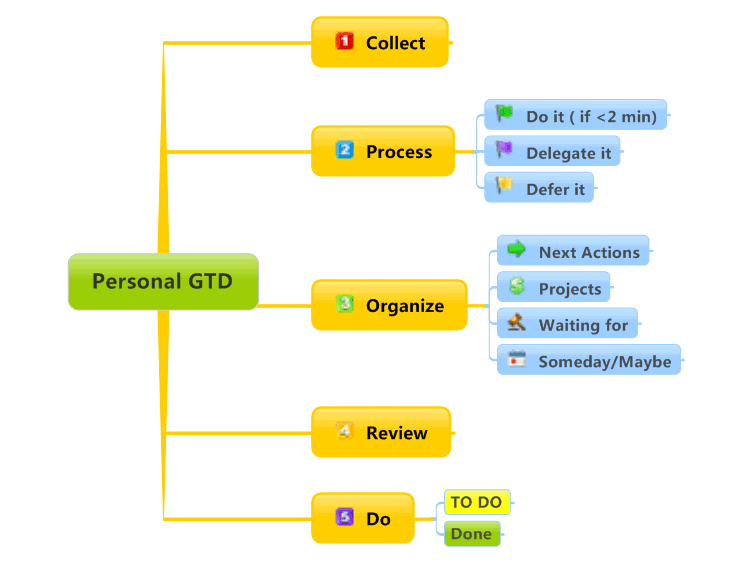
My Personal GTD System:

My Homework GTD System:

OUTSIDE (PRODUCTIVITY & THE BRAIN)

OPTIONAL EXERCISE

Image from GoodReads.com
Image from GoodReads.com

STUDIO (CREATING MAPS)

  • Simplify Refresh MDA
  • Design Maps for Refresh
  • Draw The HUD for Resh in GIMP
  • Draw Rough Character Sketches
  • Read Carol-Ann Duffy packet for English
  • Determine if I’d like to work in a group for the Carol-Ann Duffy unit
  • Complete Week 10 History Assignment ARW reading #1 pg. 84-91
  • Await other Assignments Tuesday and Friday
  • Ask for suggestions on future projects

CONTROL ROOM (PRODUCTION)

  • Complete Week 10 History Assignment ARW reading #1 pg. 84-91
  • Determine if I’d like to work in a group for the Carol-Ann Duffy unit
  • Read Carol-Ann Duffy packet for English
  • Simplify Refresh MDA
  • Design Maps for Refresh
  • Draw The HUD for Resh in GIMP
  • Draw Rough Character Sketches for Refresh
  • Await other Assignments Tuesday and Friday
  • Ask for suggestions on future projects

WHAT I LEARNED and PROBLEMS I SOLVED

I learned more about GTD and how much it helps in all aspects of life. I’ve even started to use it myself for both homework as well as other work, such as a hobby, video game development in my case. Even though I’ve only had a fully functional GTD system for two days, although I’ve already seen my productivity improve quite a bit!

My Trello board was working just fine before, although it did have its drawbacks like assignments wouldn’t always make their way into the board and a backup system would have to be used. Although GTD solved that because now, I have a proper inbox(six inboxes in my Homework GTD, one for each period) to dump information into.

WEEKLY ACTIVITY EVALUATION

I really enjoyed this week. I like learning about GTD and even making my own as well as implementing GTD into my existing time management systems. It has helped me quite a bit with productivity, I feel like I’m even improving in the areas I’m already quite good in, such as time management, and it’s all thanks to GTD!

Getting Things Done

“Day 092/366 – To Do List” by Great Beyond is licensed under CC BY-NC-SA 2.0

Your toughest work is defining what your work is! –  Peter Drucker

SUMMARY

I completed the first assignment of unit 3 in history, spent about 3 hours more on it than I needed to but all that led to an A on the assignment so I’m very happy with it. But starting a new project in Unity is my highlight of this week, and this project, in particular, has shown me why I enjoy game design so much, it makes me happy, especially when I achieve something, like fix a bug, or release a new build, add a new feature, ext.

  • DELETE ALL OF MR. LE DUC’s INSTRUCTIONS, AFTER YOU ARE DONE

PRACTICE ROOM (TUTORIALS)

Image of David Allen at TED Talk
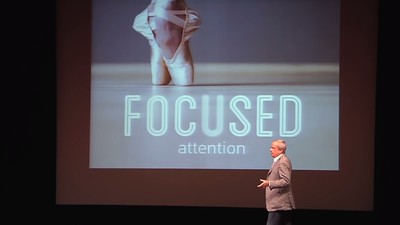
Screenshot from David Allen TED Talk

In this ‘room’ you are going to try Getting Things Done (GTD).

STEP 1: MAKE A LIST

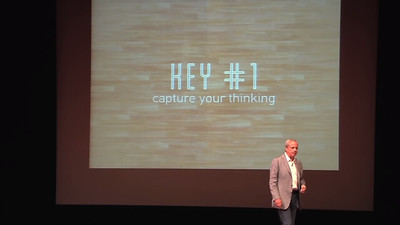
Screenshot of David Allen TED Talk

STEP 2: NOTICE WHAT YOU NOTICED

Screenshot of David Allen TED Talk


  • Daily Check-In
  • Complete English Assignment
  • Complete Blog Post
  • Complete History Assignment
  • Complete Math Assignments
  • Think of Game Ideas during 1st period Check-In
  • Complete Marketing Assignments

STEP 3: SET A TIMER

https://giphy.com/gifs/time-clock-konczakowski-d3yxg15kJppJilnW
  1. Set a timer for your first task
    1. Decide how long you think it will take before you start
  2. Start working
  3. Repeat this process for 45 minutes for as many tasks as you can complete, then take a 15-minute break
    • Get up and get a drink of water
    • Get up and go for a walk
    • Every 20 minute blink your eyes 20 times while looking at least 20 feet away
      • This is good for your eyes

Start steps 1 through 3 again, repeat for your school day

OUTSIDE (PRODUCTIVITY & THE BRAIN)

David Allen image
Oct. 2020 Lucidchart interview with David Allen
Image from FastCompany Magazine, https://www.fastcompany.com/3026827/the-brain-hacks-top-founders-use-to-get-the-job-done
Image from FastCompany Magazine, https://www.fastcompany.com/3026827/the-brain-hacks-top-founders-use-to-get-the-job-done
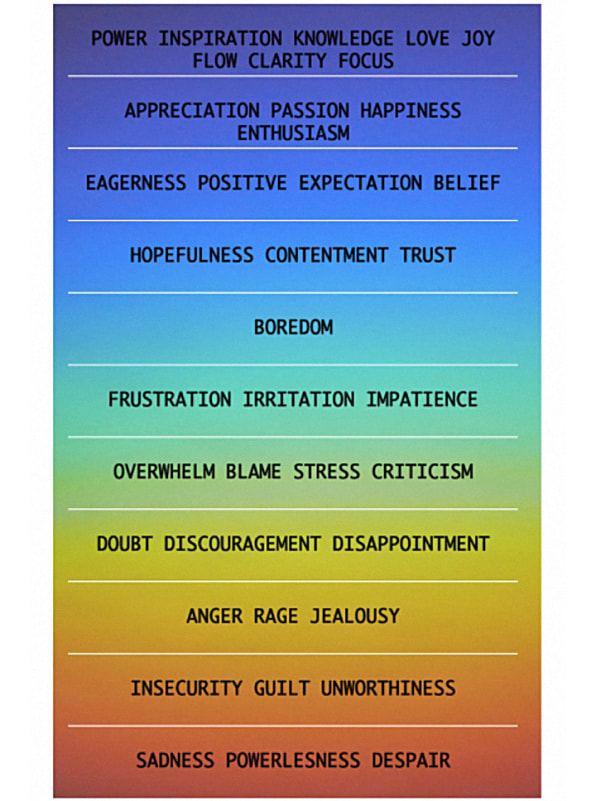
  • Reflect on GTD and getting to the top of the colorful list above for a minute
    • How can the GTD process help you tame the crazy-busy dragon of modern life?

  • Then, go for a 15-minute walk, if it is safe to do so
  • Write a few sentence reflection
  • DELETE ALL OF MR. LE DUC’s INSTRUCTIONS, AFTER YOU ARE DONE

OPTIONAL EXERCISE – Literally, read the article and go for another walk 🙂

 Katia Verresen homepage
Katia Verresen, kvaleadership.com

“I coach C-suite executives and rising stars from the earliest startups to Fortune 100 companies. My passion is to help ambitious leaders achieve their full human potential.”  – Read more about Katia…

WHAT I LEARNED and PROBLEMS I SOLVED

This week, I have learned that my history teacher appreciates a more healthy combination of quoted evidence and evidence put in your own words rather than all quotes, whereas my English teacher is perfectly fine with quotes. Onto game design, I have learned the way I went about movement code in A Safe Place, as well as an untitled project I am working on, gets the job done, but interferes with way too much to be good unless you only have movement on the X-axis and aren’t going to flip the character. I came across that because I’ve recently been watching Blackthornprod because I wish to add platformer-like movement into my game, so that simple three lines of code for movement had to go. His tutorial on platformer movement taught me how to flip my character so they face the right direction they’re walking towards, as well as how to make them jump, one, two, or three times.

When I booted up Unity this morning, I could see nothing but the background and the player’s weapon. I thought, what the heck is this? I decided to try a few things, I went back to a revision from earlier yesterday (Unity Collab is nice even when you’re working solo because you can back up assets with it and use it for debugging purposes), I tried disabling and reenabling the scene, and I tried restarting Unity. But it was a quite simple problem, only the background and player’s weapon were on a visible layer, so I needed to fix that and do some layer sorting before I got to work.

WEEKLY ACTIVITY EVALUATION

Tools, Time, and Rooms

SUMMARY

I thought all the ‘rooms were interesting, I think how we separated learning the theory from practicing the theory. I felt myself becoming more knowledgeable in game design in the process and had fun while I was learning.

PRACTICE ROOM (TUTORIALS)

Game Engine: Unity

Video Tutorial: Basic Principles of Game Design

Game Design Playlist

In this Brackeys tutorial, Brackeys explains the principles of Game Design as well as the very unusual way that he got started with Game Design at the age of 14.

CLASSROOM (THEORY & ANALYSIS)

I completed the Basic concepts chapter, where I learned about the use of the console, as well as arithmetic operators. I also started the first lesson of Conditional Statements and Loops, where I learned about the if statement, the else clause, and the if/else statement. Although I already knew about a few of these, I was definitely taught a thing or two. I didn’t know like I didn’t know prefix vs. profix and the similarities and differences. So now I can walk away a bit more knowledgeable about C#.

LAB (THEORY PRACTICED)

West Of Dead is probably just average at best. I definitely learned a few things from it, such as the true importance of staying true to a genre and crafting your game around, the importance of sound design, and the importance of the motivation of a video game. I played two runs in West Of Dead, the first I didn’t know the controls at all because I don’t play twin-stick shooters very often, and the second I got to know the game well, it’s the gameplay, sound design, it’s store Now my largest complaint, and I have a few, there was absolutely no feedback sounds whatsoever. I played the entire second half of the first level on one health and didn’t even know it,. While I’m on the sound design topic, this game lacks diegetic sounds as well, the only sounds that were made throughout my session were the music, the narrator, who’s voice was very quiet by the way, and revolvers firing. And that’ll lead to gameplay and story which were also complaints of mine. This game advertises itself as a twin-stick shooter as well as a rouge-like, yet nothing comes from death, no story no progress, nothing. This isn’t how a rouge-like should be The lack of weapon variety was also a bit of an issue, or, at least, it didn’t feel like much gameplay-wise. Although the devs did a good job with the non-diegetic sounds that were there. The music, choice of narrator, and other non-diegetic sound effects that were present all fit the theme fairly well. I  think I’ll sleep on this game, give it maybe another run or two and see if my impressions change. But for now and probably forever, West Of Dead is not good, but not bad either.

OUTSIDE (CREATIVITY & THE BRAIN)

This game is a race against time as I try to beat my nemesis of stress and the headache I woke up with, the faster I complete work the less of a problem they become, the less the motivation bar drains, and the more points I score, once the motivation bar reaches 0, you lose and must start the level from the beginning. The only way to get the bar to drain slower is to find books, educational Youtube videos, or other material that will help you understand why it’s important that you learn this material. In this case, the motivation bar will turn into a time bar set for three hours.

STUDIO (SONGWRITING)

WEEKLY ACTIVITY EVALUATION

I think the idea of the rooms worked fairly well this week. My favorite was the lab room, I loved being able to sit down and play a game, analyzing it as I do, looking for it’s good and bad, in my case, West Of Dead had weapon sound effects, music, and a narrator that fit the game’s theme, but a depressing lack of feedback sounds for low health, causing me to play my entire second run on one HP. Overall, it taught the do’s and the don’ts when I take a shot at designing my own game. I also liked the Outside Room, where I thought about my day as a video game narrative, it ended up helping me come up with an idea of my own.

Invoke and InvokeRepeating/ Tip for efficient coroutines

As I was getting the Unity Forums open in preparation to get back onto Unity, I saw an extremely useful tip in reply to me thanking that same person for another useful tip about coroutines. I think both tips are too valuable not to be shared with the rest of the class.

A Tip for more efficient coroutines:

Well, two on coroutines, but who cares? The more the merrier!

  1. Not adding a keyword such as private or public before an IENumerator automatically makes it private.
  2. StartCoroutine() does take a string argument of the method name, but it’s more efficient if you call the function as you would on any other line inside of StartCoroutine() as the computer can find it more accurately.
  3. APSchdmit also said that if you want to delay it, you need to set up your StartCoroutine() like so:

A tip on Invoke and InvokeRepeating:

You might find yourself using these a lot, so these are quite useful.

Invoke and InvokeRepeating are quite similar when string arguments are used. Instead of this, you should use the keyword “nameof” and enter the name of the method in parentheses. After those then you want to call the parameters.

That was a lot, so here’s an example of me using InvokeRepeating normally:

InvokeRepeating("Spawn", spawnTime, spawnDelay);

It works, but not as efficient as the tip in the forums, here’s that same line of code done the much more efficient way:

InvokeRepeating(nameof(Spawn), spawnTime, spawnDelay); 

StartCouroutine(nameof(coroutine), delay);

These tips were replies to my comments on this forum, both tips given by APSchmidt. I hope this helps you and if APSchmidt sees this, I hope you know I am very thankful for your advice!

Developing Quality Workflow


What is Workflow?

Image Creative Workflow from Behance.com, https://www.behance.net/gallery/27919515/Creative-workflow-GIF

Work•flow /ˈwərkflō/

“The sequence of industrial, administrative, or other processes through which a piece of work passes from initiation to completion.” – lexico.com

What is a quality workflow?  How do we develop it?  Below are elements of the production cycle that most creative people move through as they create something.  First, we must identify the stages of project production. What is each stage and what are the quality checks for each stage.  Read on and find out!

Stages of Creation Development

Inspiration

How do we find ideas to develop?

Image “inspiration” by Cornelia Kopp is licensed under CC BY-ND 2.0

Playing other games helps me a bunch with inspiration. Although don’t play them absent-mindedly like you usually would, analyze the game, what are the mechanics? where is the game taking place? What’s the art style?, what are the controls like?, do I like the music in this game? How does it fit? How is the narrative told? Then you want to take these answers and write them down in a notebook, no computer for this one. Then you want to look over your answers for a while, ten minutes is my minimum, fifteen to thirty my average, and ask yourself “what combination makes sense?” Then on the next page in your notebook you want to write that combination of mechanics, aesthetics (art, music, setting, ext.), and dynamics (hit markers, hit sound effects, death sound effects, score increase SFX, ext.) Once you have the combination figured out, as well as a title and a logline, then you can hop on your computer and create the Game Design Document (GDD). You can also talk with friends about games and based on that conversation, fill out a page or two in your notebook with ideas and hop onto your GDD once you’re ready. But if you don’t have the time to play a video game or talk with a friend for half an hour, you could always take a twenty-minute shower, most people think of very creative ideas in the shower, it’s been proven, and on top of that, it’s very relaxing. Here’s the article so you don’t think I’m crazy.

Intention

How do we clarify our specific goal(s) for a project?

Image “Goal Setting” by angietorres is licensed under CC BY-NC-ND 2.0, https://www.flickr.com/photos/45810515@N03/4564765098

The best way to do this would be to write these in a notebook, preferably at the bottom of the page where you wrote the basics of your game by analyzing a game, or just thinking of the idea while you’re in the restroom or in the shower, whatever floats your boat. To figure out if you’re goals are do-able, do some research on exactly what you wish to accomplish. For example, I’ve already made the GDD for an idea I had for a game called Black Friday, a Black Friday-based battle royale, although I’ve found out through research as well as experience that multiplayer is a no-no until you have established yourself in the Games industry and have a solid team of developers and a solid budget for your game. But for goals for yourself as a person, go off of your experience, based on your past, and your present abilities, what can you do and what will take so long that doing it would be too much work for the time you are given

Pre-production

How can we brainwrite, brainstorm, storyboard, and plan our ideas at this phase?

Image of Mind Map on how to create a mind map, Vitaly Kolesnik, https://www.flickr.com/photos/ult/7577744858/

The first step is to kick ideas around the table, you can use a piece of paper and a pencil to brainstorm, it’s a little better that way, but if you must use your computer, I would recommend Google Docs with the MindMeister add-on. All you need to do is create a bullet list of ideas, select all, go to Add-Ons< MindMeister, and let it process your list and make it into a mind map. Once you get it just right, you’ll want to Right-click on the map and save it to Keep, and you’ll then want to open Keep, RightClick< Save Image As.

By Caylakwiki – Own work, CC BY-SA 4.0, https://commons.wikimedia.org/w/index.php?curid=48770609

I would recommend Trello for newbies to the Game Design scene for its sheer simplicity and ease of use. After you’ve created your account, it just takes one click to set up a board, and from there you should start by creating lists. For Game Design, I would do Pre-Production, Production, Post-Production, and B-List (Extras for if you underestimated a certain task). From there you can create cards within a single click for each task, you can create labels within the task cards to indicate who works on what via color-coding. You can also assign due dates to tasks as well as assign members to a task. While I’m on the topic of members, let me add that you can invite members to your board by typing in their Trello username, you can also type in their email regardless of if they have an account. Powerups just help even more with managing a project in Trello, some you might find yourself using often is Calender and Butler. There’s also a pro version of Trello but the free version is perfectly fine for the purposes of this class.

For your Game Design Document (GDD) and Pitch Proposal, there are two good options out there that I know of. The easiest to use and the one that gives the best results in my opinion is Dundoc. After you sign up for an account in Dundoc, you’ll be brought to your Account Page, where you can start projects, edit your account info, check the status of your plan (yes, there is a paid version of this software, but most people in this class shouldn’t have a problem with the free version), at the top of the page is how you can start a project. In a project, there are a few templates you can choose from, or you can create all the sections yourself, but do yourself a favor and go with the templates for this class, because you’ll want to start this step as quickly as possible so you can complete the rest of Pre-Production by the end of week 1 of your sprint. In each section, you can type a description, type out a bullet-pointed list, and insert a document from another source (handy for a flowchart or a screenshot of the early character/level sketches). You can title each project (this will be the name of your game), you can add an image for your project (it can be a logo or the sketch of an important character, something that helps define what your game is and why you chose to make your game the way you did), and you can add a quick logline explaining the main premise of your game in a single sentence. Although Dundoc relies heavily on it’s paid plans, and thus the free version has some limitations to it. each section in a project can only have ten subsections, you can’t delete projects in the case you end up with a duplicate created by yourself or another editor, and you have an account limit of five projects. Although this should work for most students in this class.

If you’re like me and the free version of Dundoc didn’t work for you in the long run, as you have too many ideas floating around in your head that would make fine games (my problem), or you’re indecisive and can’t find yourself sticking with one game (something else you could use to describe me), then you can use the other option, completely free with no limitations or paid options, Google Docs. It sounds rather basic, using a program that you use in daily life for a GDD, but what’s wrong with basic? You can do anything you could do in Dundoc and a little more if you’re willing to put in the time, heck, you can even copy and paste a Dundoc template and emulate a Dundoc GDD from there! One of the larger downsides is that with Google Docs because it’s used for so many things, you have to set this all up manually, but what I do is I made a GDD template for Docs and make a copy of that every time I create a new GDD. Another downside is that you have to create your proposal in a separate document, although either way, that’s usually the way you’ll wind up going.

By and large, I would recommend Dundoc to beginners and people that just want to put out a game and be done with it. And I would recommend Google Docs to people who have had more experience in Game Design and are willing to put some more time into this. For the people wanting to use Docs for a GDD, I will update the template and link it when I get the time.

For managing tasks, a process that should be used is the Fibonacci Sequence. Each team member gets an envelope of cards, the numbers on the cards range from 0 to infinity, these indicate the complexity of the task. One person announces a task, and everyone on the team picks a number for that task, 1-3 means it’s doable in a period, 5-8 means we should either work on this after school or next period, 13-21 means that it’s a big task that’s going to take a significant amount of time and effort half oof your production week at the most, and infinity is too complex of a task, can’t be completed in the time given. Each member puts down a card face down after a task is announced. Once everyone has taken their turns, flip over the cards. Now calculate the average of the cards and this is the complexity of the task, if the numbers are not divisible evenly, take turns explaining why you chose that number, this should be done no matter what but is most important if you can’t find an integer average. Once the average is found, write it next to the title of the task. Rinse and repeat until all tasks have numbers beside them.

Production

Image “Group Shot” by breadman017 is licensed under CC BY 2.0, https://www.flickr.com/photos/breadman017/2184695282/

How do we communicate with each other and execute our plan for this phase? This is where we actually make the project.

Aside from using Unity, (and PlayCanvas if you only have a Chromebook), you should have daily check-ins with your team about the current state of your game and what needs to be done, the easiest way to collaborate is with Unity Teams, although if you’re using a Chromebook while your other team members are using Windows, Mac, and maybe even Linux, then you’ll want to make a GitHub repo for sending code back and forth between the Chromebook user and others, Unity or no. You’ll also want to use Google Drive and maybe Onedrive if you like Onedrive better for sharing other assets. As for measuring quality, it’s probably the easiest here. Here you and your team can simply playtest and see if the mechanics work well and as intended.

Post-production

How do we communicate with each other and execute our final stages of the project for this phase? This is where we publish the project.

At these final stages, you want to use most the same tools you were, a game engine such as Unity, you don’t really need GitHub anymore unless the PlayCanvas member is assigned Quality Assurance (QA), you still need cloud-based storage, one I didn’t mention above that I really should is Dropbox, the one that started the cloud-based storage trend in the first place and is still a perfectly valid option. Although you might want to add a Digital Audio Workspace (DAW) and Photo Editor into your workflow, for this, I’m using GIMP for photo editing and sprites, Audacity for editing SFX, and LMMS for making music for my games, but when we get back in school, you’ll be using Photoshop, Audacity, and GarageBand. As long as they do the job and do it right, it doesn’t matter what you use. So what is the job and how are we gonna do it? In Post-Production, you want to make sprites, these are your final sprites, so put in your best effort! You want to make the sounds and music for your game, so be ready with some knowledge of Audacity, GarageBand, or any DAW you can think of,  and then add your instruments and make loops, catchy melodies, like seen in Super Mario Bros. (1985) and not annoying loops.

Presentation/Performance

How do we share our project with our learning community, advisory members, and the world?

Something you want to have someone doing in the background of production is to prepare a pitch presentation in Google Slides or PowerPoint. In this, make sure to have the name of your game, three quick slides of who did what? (NO LAST NAMES) The first slide is their name and what they did for the team, the other two being evidence of their work along with them explaining what they did and why, you might want notecards for this because the only text on the screen should be the title, team member’s names, and roles on the team. Before this, you want a single slide of an image that properly represents your game, preferably a sketch of an important character, or the game cover image (if you have one), although a stock image will do as long as it’s listed under a Creative Commons license and you cite it in your last slide unless it’s listed as Public Domain. Unless you went with a stock image that’s not Public Domain for your second slide, then your last slide should be a “Thank you!” or “Thank you for your time!” slide, they’re taking time out of their day to watch you present this. After the presentation has been completed, rehearse it two-three times, otherwise, you’ll screw it up, royally. Presentation day, now you don’t want to seem nervous otherwise you’ll stutter and a lot of “um’s” will come out, delaying your ideas, and making you look like an idiot.  The TED talks above say this better than I do though, so go watch those if you haven’t already.

Feedback

Image “Members Support Team’s Disscussion” by love2dreamfish is licensed under CC BY-SA 2.0, https://www.flickr.com/photos/dreamfish/3675829917/

How do we conduct a feedback session at the end of the project development cycle?

You only need to speak and communicate with your team to conduct a post-moterm session, but a Word Processor, such as Google Docs or Microsoft Word, or a Spreadsheet software such as Google Sheets or Microsoft Excel might come in handy to document what went wrong and what went right as you discuss it at the end of the session. The only way to measure the quality of points brought up in a post-moterm is to look at yourself next session and ask yourself if you’re improving based on the points brought up in the last session’s post-moterm, if you are improving, great! if you aren’t, then something needs to change.